
Larger photos courtesy of Paul Shukin.
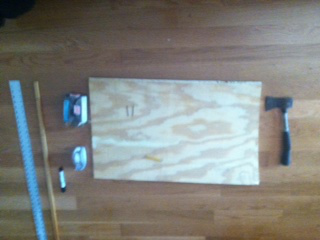
- The parts/supplies and tools we will need are:
Parts
- A board roughly 2'x3' or 12"x18", having a height / width ratio of about 1.5. The board pictured is slightly smaller than 2'x3'.
- A box of 1" roofing nails.
- A small, roughly 1"x2", preferably hardwood, board from which to make the flippers.
- If the flippers are near or above 1" in depth, two longer nails for the flippers.
- A roll of matte desktop tape.
- A regular marble to use as the pinball (or, if you prefer, a ball bearing of the same rough size or smaller).
Tools
- A pencil to sketch and plan placement of features on the pinball machine. I used a large marker so that my marks would be more visible; ordinarily you want subtle pencil markings for where to put stuff.
- A hammer to pound nails in. The hatchet shown has a notch to remove nails, and it would have worked, although the work was done with a regular clawhammer.
- A ruler or measuring stick, barely used apart from the flippers.
- Now, or after the features start to be set up, you can decorate the board to suit your taste. For these purposes I have not demonstrated artistic decoration of the board, but you can apply decoration now or at any later point where it would make sense.
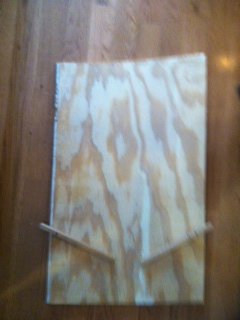
- This is my first pass at making the flippers. I measured, marked, and drilled a small hole through where I wanted the joint to be, but large enough to accommodate their nails.I wanted to have some slack to let the flippers protrude beyond the outside, and I gave too much slack. The flippers touch each other, making for insufficient challenge.
- I cut a little less than half an inch off of the edge of the flippers.
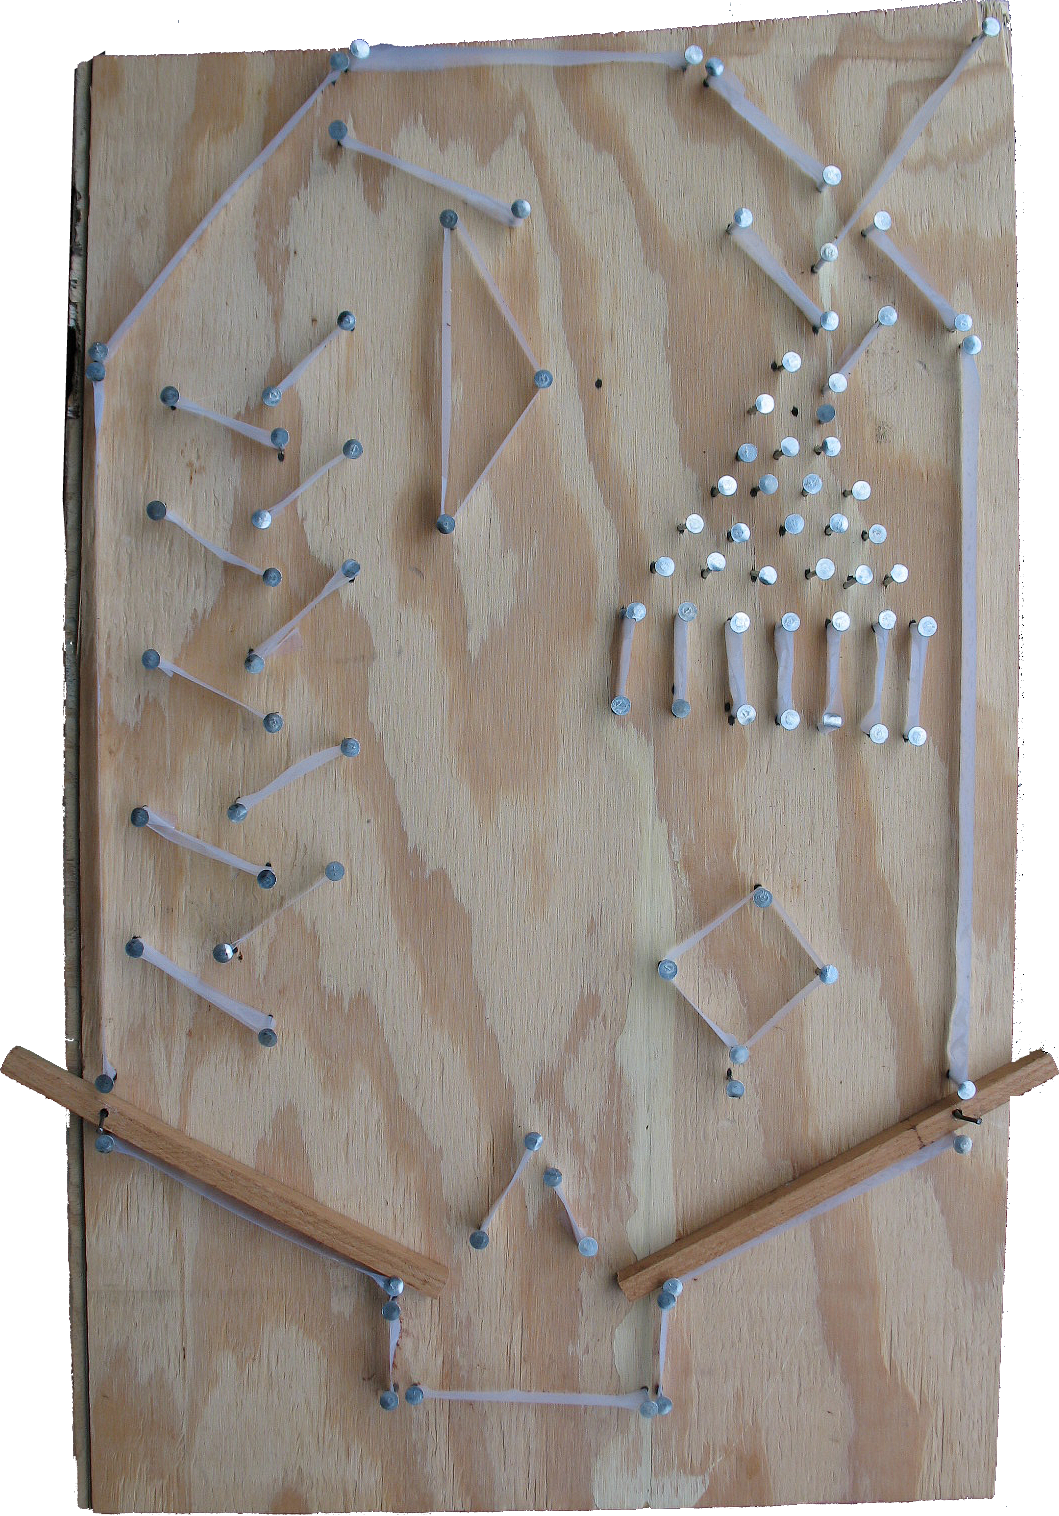
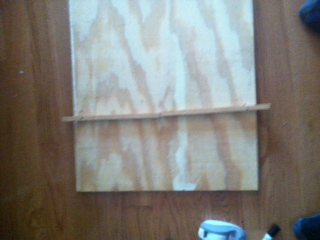
- I sketch dots for where the perimeter will be. The top right area is a little more complicated than the dots show, because that's also where we will have the marble enter the game, but that will come later.
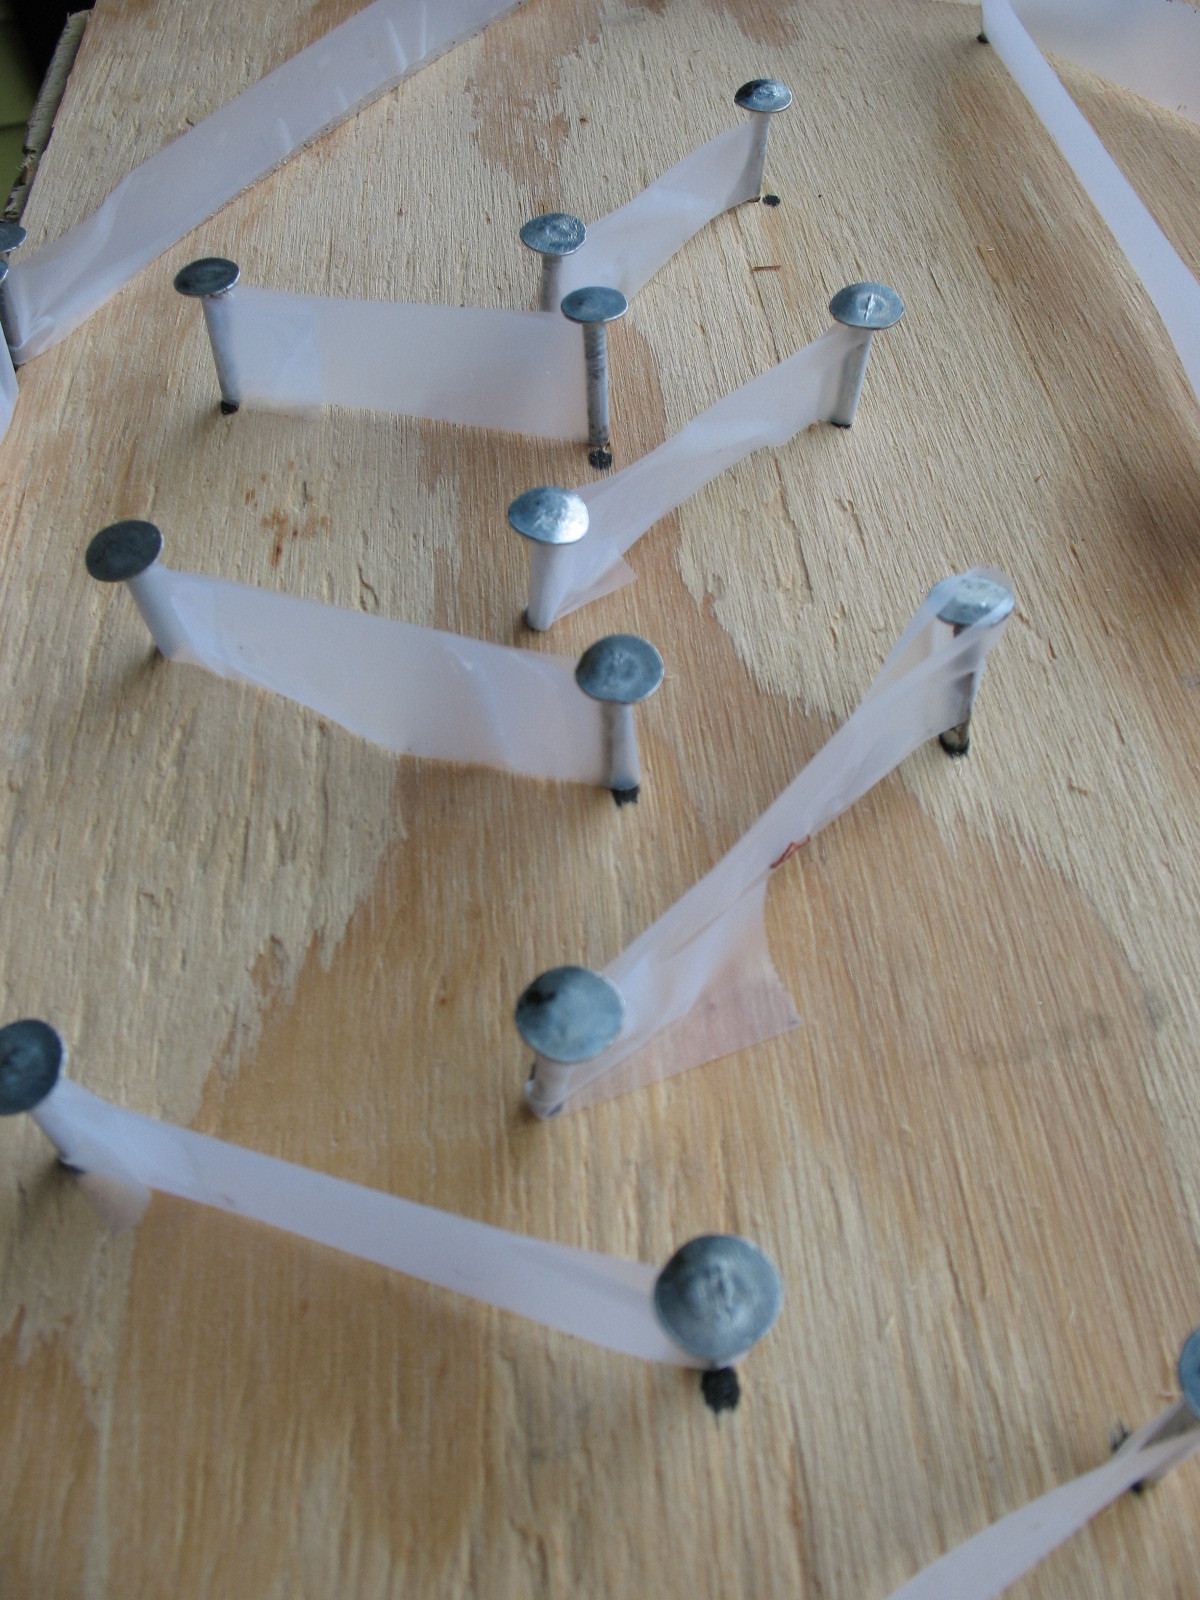
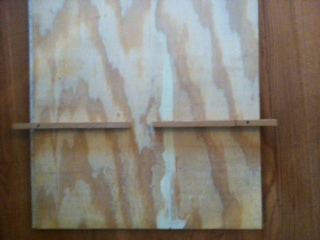
- We add nails where we want to anchor an endpoint of part of the perimeter wall. The nails should only be pounded partway in, with enough sticking out the top to wrap an unbent strip of tape around.
- Here we have tape between every pair of nails but the top right. I would like to comment that there are two basic approaches to a joint: one of them to have one nail for each side, and another to have one nail with tape placed so as to be taut and therefore elastic. I will follow the first approach for all but the last features added, but both approaches are valid.
- Before we finish the top right part of the perimeter, we set in place something to let us put the ball in play.
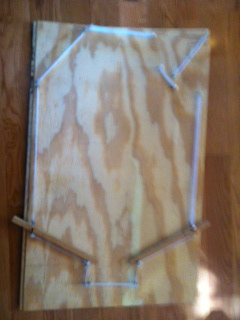
- Having put in place a mechanism for the ball to roll into play, we finish putting in place the upper right part of the perimeter.
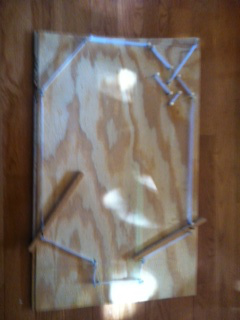
- Up to this point we have been addressing things that are, relatively speaking, necessary and less negotiable. There may be other ways to handle the perimeter (we could, for instance, have made the top of the perimeter a dip down rather than a bulge up), but apart from artistic adornment (not shown in this example), there hasn't been much call for creativity.From this point on things are different. I will give examples of what can be done, but only examples of what can be done. There is much more room for creativity in filling the interior of the machine with features and space.
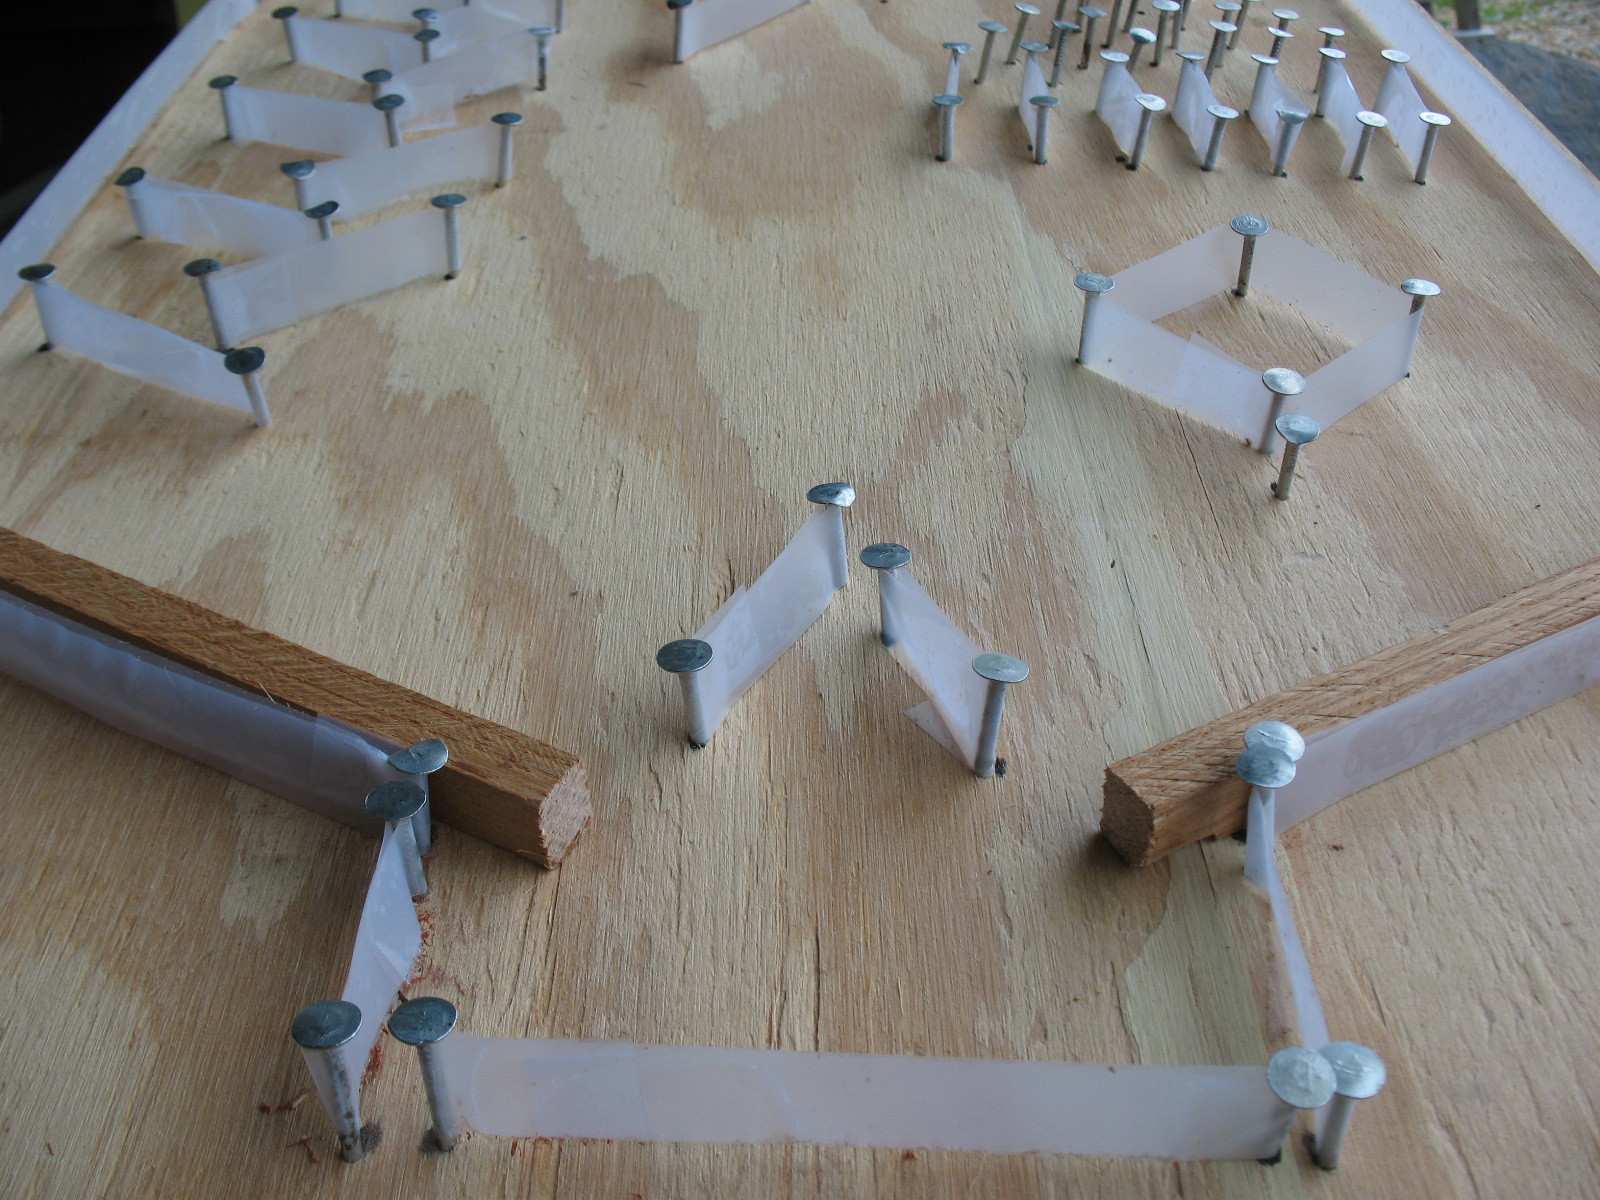
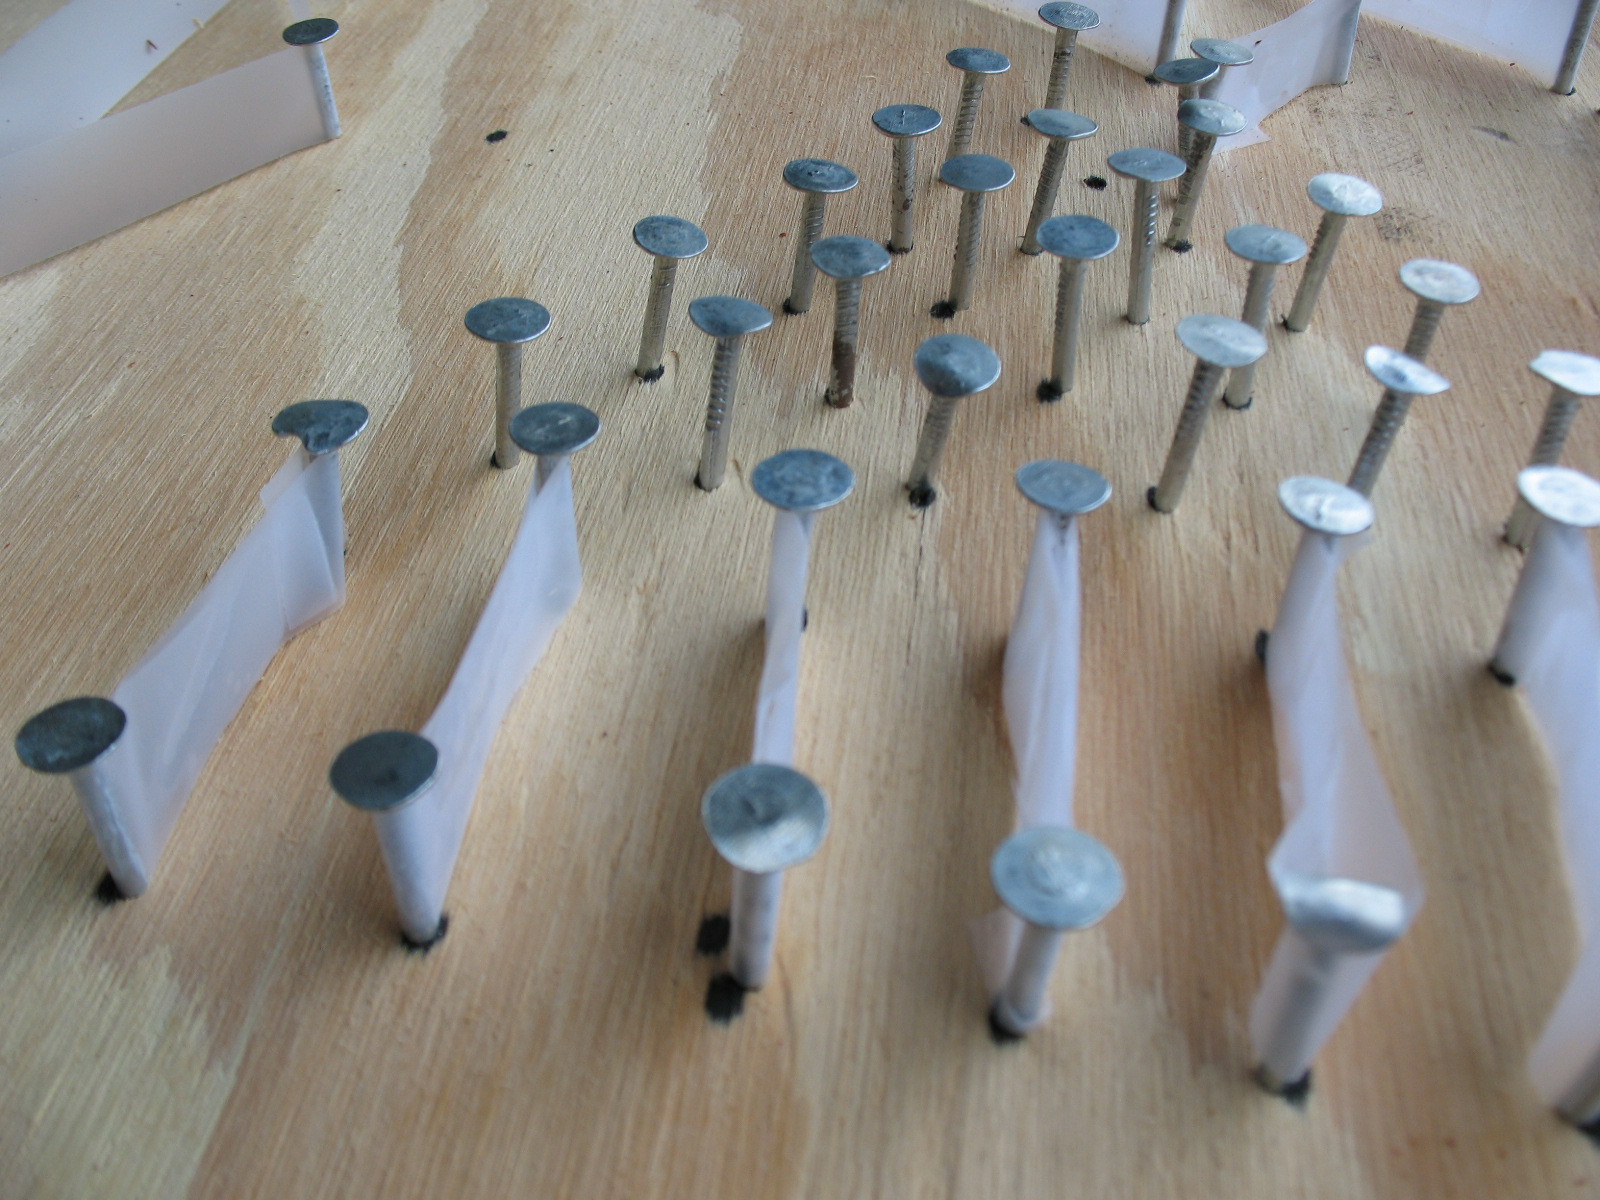
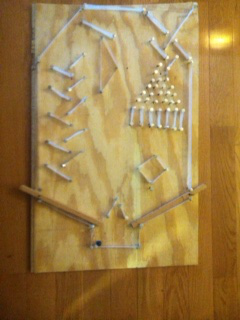
Here we have a forest of nails for the ball to tumble down when it first comes into play, and when it is launched into the forest of nails in play.
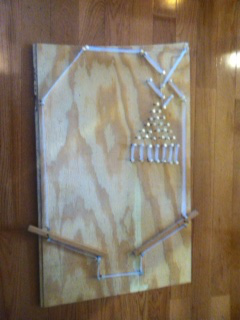
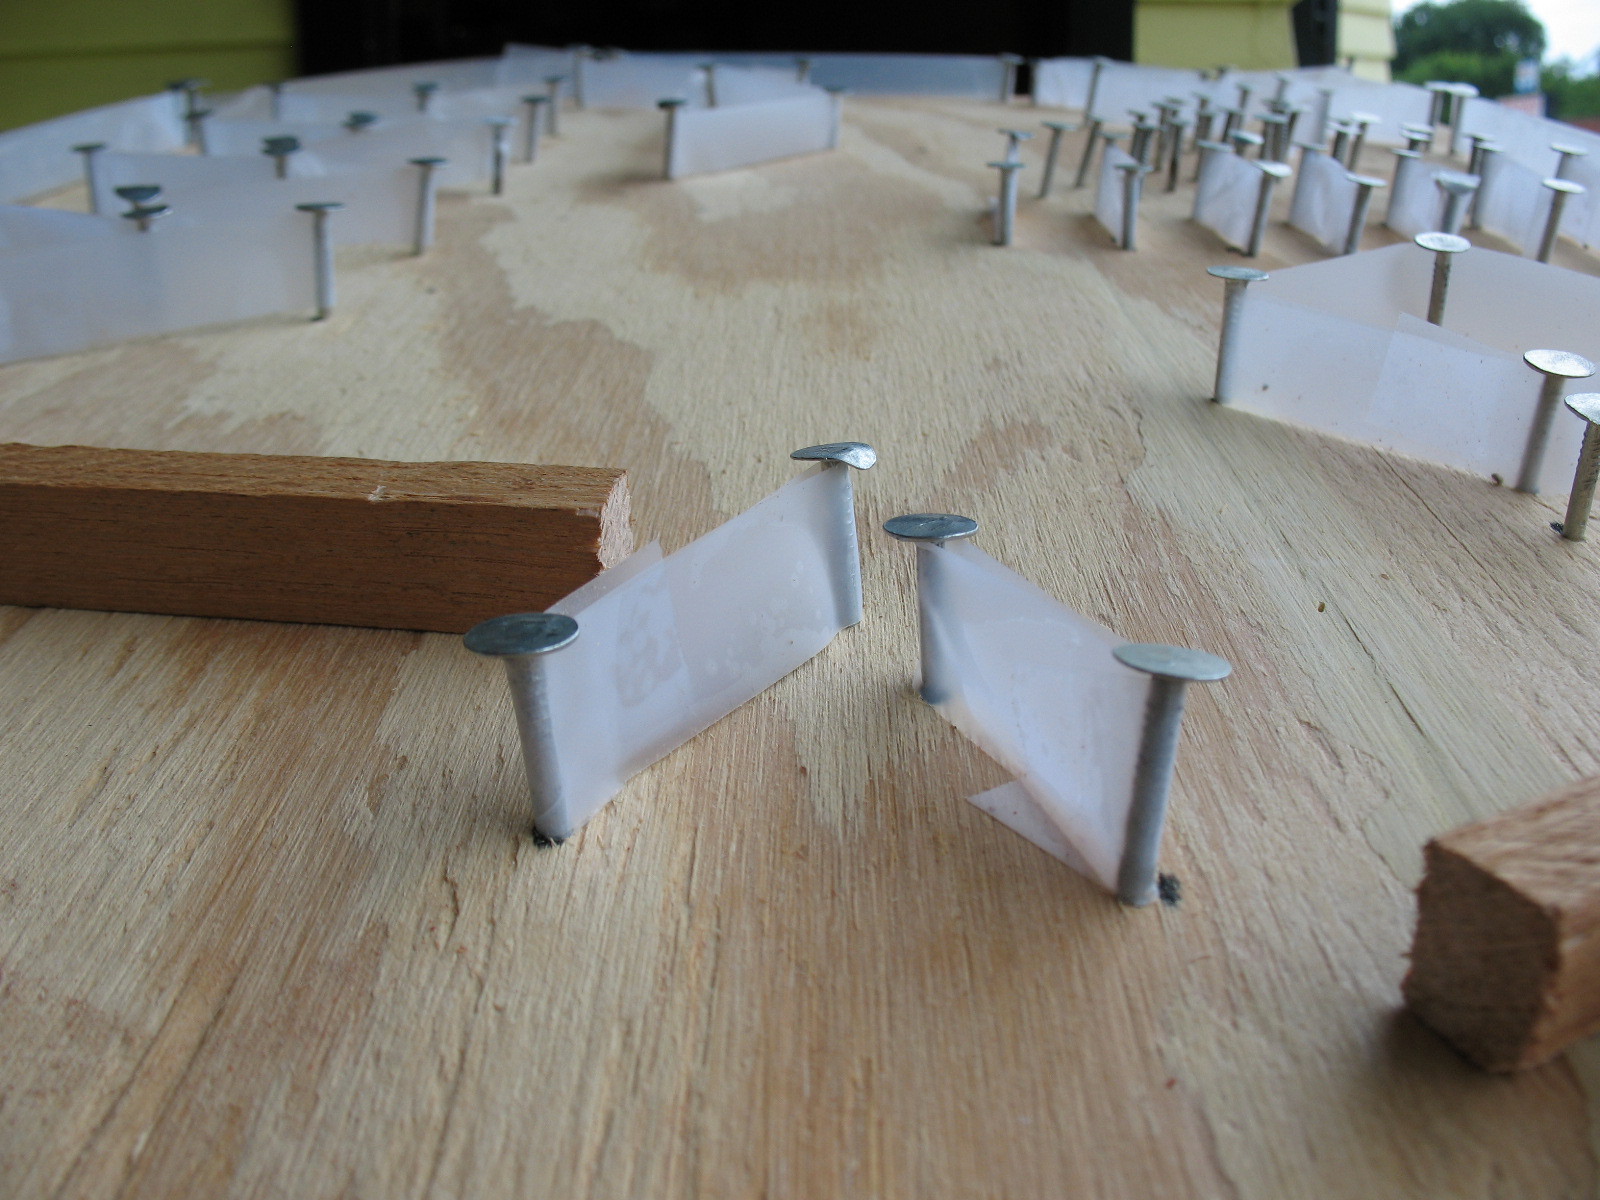
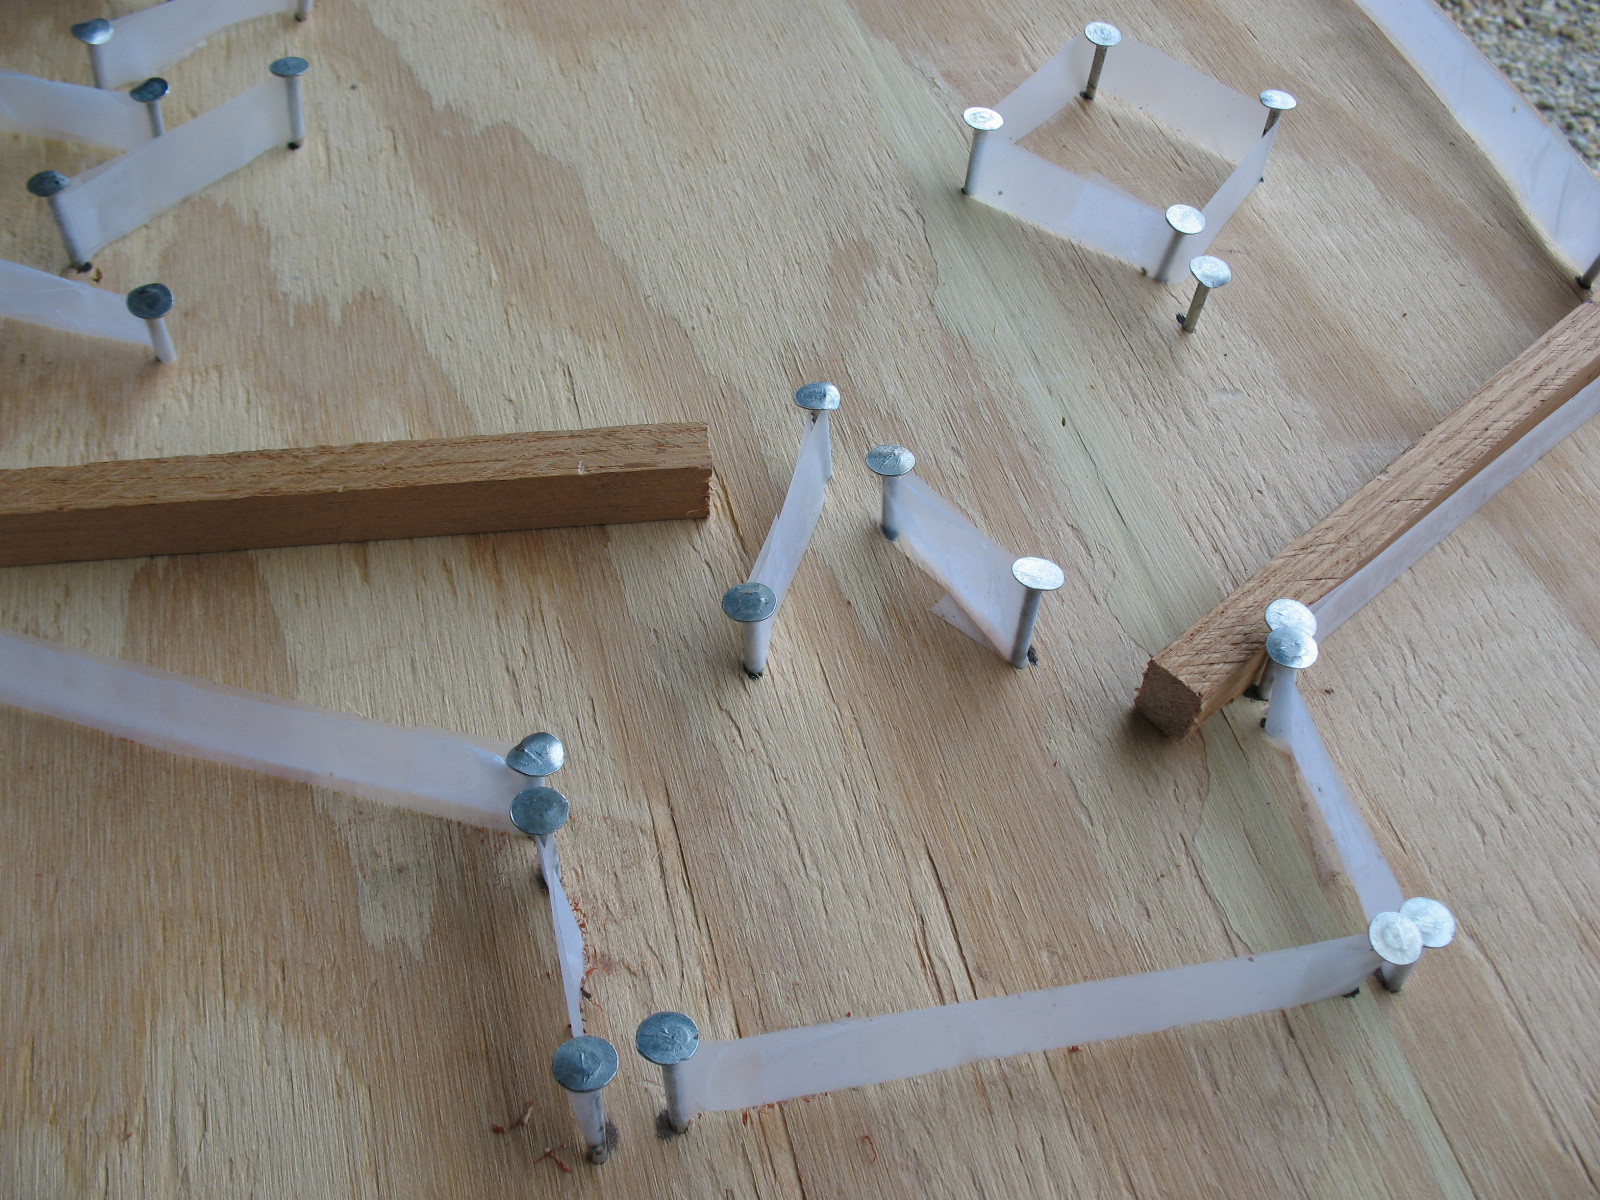
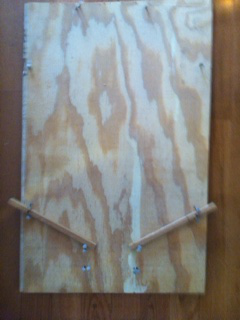
- Many pinball machines have bottom flippers that don't come near meeting, but have something to deflect a ball that rolls down the center. Here we have added a wedge between the flippers. If this makes things too easy for an experienced player, we can take the tape off, leaving just the nails.
- Here we add a single feature to the left, a place for the ball to tumble down. This specific feature is both large and simple; it could be replaced by a larger number of smaller geometric shapes, for instance.
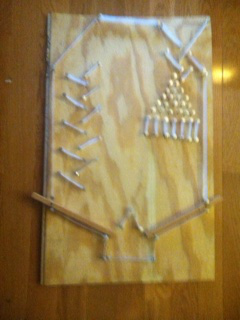
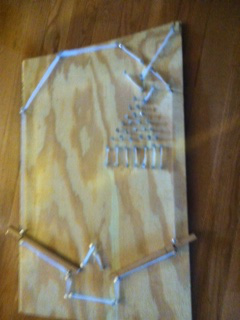
- Here we add the last features we will add to the pinball surface: a diamond to the lower right, with a nail below it to prevent the flipper from smashing the marble into the side, a narrow triangle at the top (up at the top, available space is precious), and something to deflect a straight shot up from the left flipper into the tumble area to the left.
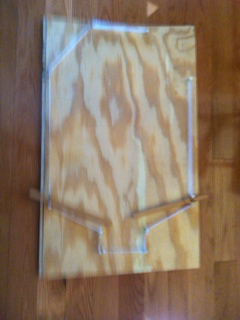
- Lastly, but most importantly, we go to a frame shop or harware store to put a transparent hard plastic sheet over the surface to reduce the risk of eye injury (and to protect our delicate pinball surface and make the pinball machine last longer).


The machine as built can be propped up by books and the like, reaching the desired height. At times in the past I have built pinball machines with rear legs a few inches long.
Happy playing!
I have made several pinball machines vaguely like this, and this pinball is more intended as a proof of concept illustrating a broader concept. It is not intended as a straightjacket or a flavor of Kool-Aid, as the best or only way to make this kind of pinball machine. You want a different aspect ratio? Sure, why not? You want to add artwork? Please do. You want to make your own design on the main play area? Good; I tried to make a good design but perhaps you can do better (or just touch it with your own design). You want to make four flippers? Go for it. You have a way to make the flippers spring-loaded? Cool. You want to make a base of Lego surface for part of the playing area, maybe rotated to a 45 degree angle and inset? I would remind you that Legos are inelastic where most parts are deliberately elastic, but there are still things you can do with inelastic parts. You want to add a Lego Mindstorms robot to be more interactive? Go for it, and send me a video. Are you a maker who makes a spinoff on a 3D printer? I'd love to see your writeup. I'm not trying to show THE correct way to do something, only illustrate the possibilities. But if you want to imitate my example to the letter, you are welcome to do that, too.